Modern Simple Clean
Our software to manage our line of UVI gaming peripherals.
Some products might not be supported.
UVI One software
Before installing the UVI One app, please remove our older software and software from other peripheral brands that you are not using anymore as it may lead to crashing or some functions not working.
Our UVI One software is published on the Microsoft store. Simply open your Microsoft store on your computer and search for “UVI One” or follow this link to start the installation.
Currently, we are supporting English, Slovenian and Croatian languages. UVI One language is preset to the language you are using for your Windows and can be changed by changing the Windows language. If your language is not supported, the English language is used.
UVI One software is supported on Windows 10 or newer.
You can use UVI One with a UVI account or without an account (offline mode). To unlock all functions of the UVI One application a user account is needed. If you don’t have an account, you can simply create one. Keep in mind that settings and profiles from devices are saved to the cloud and for that, you need a UVI account.
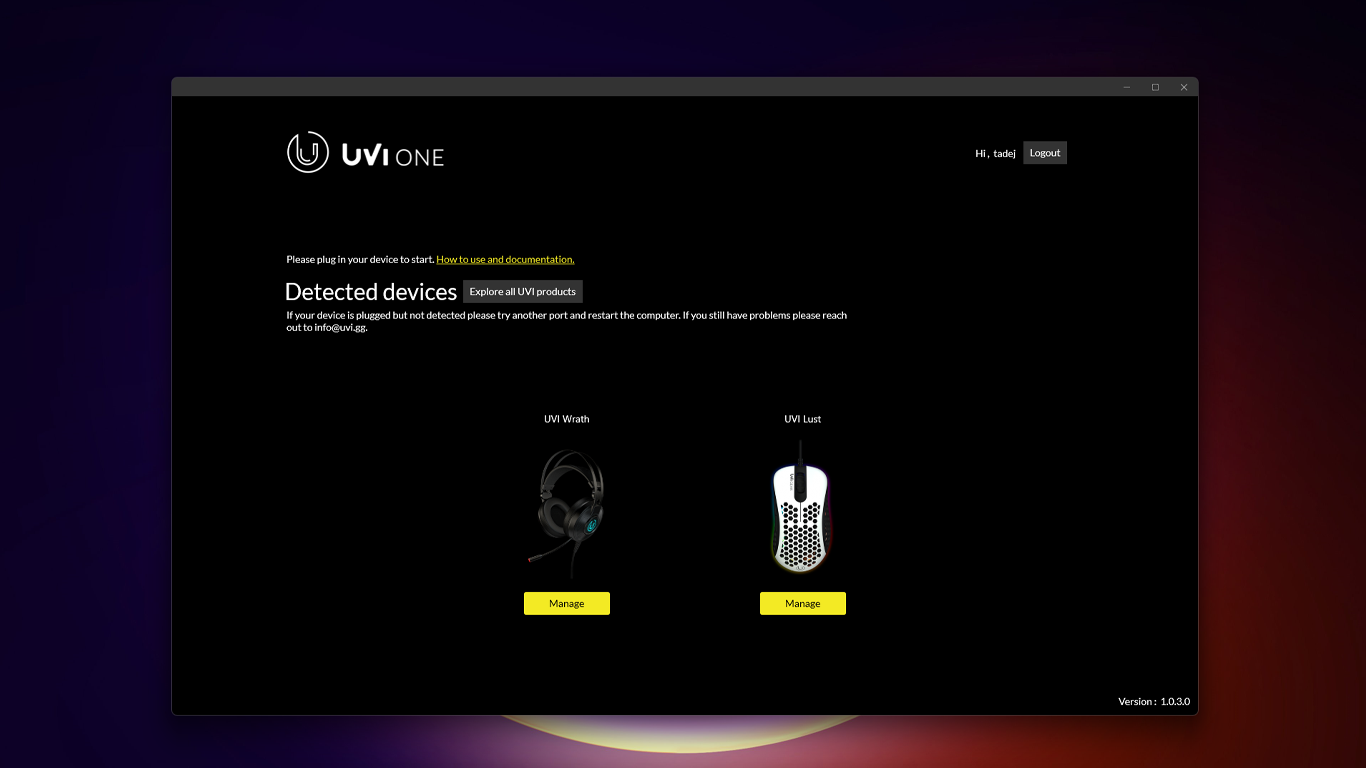
When the supported UVI device is connected, the UVI One application automatically detects the device.
For additional questions about the UVI One application or for product support please reach out to [email protected].
UVI Lust
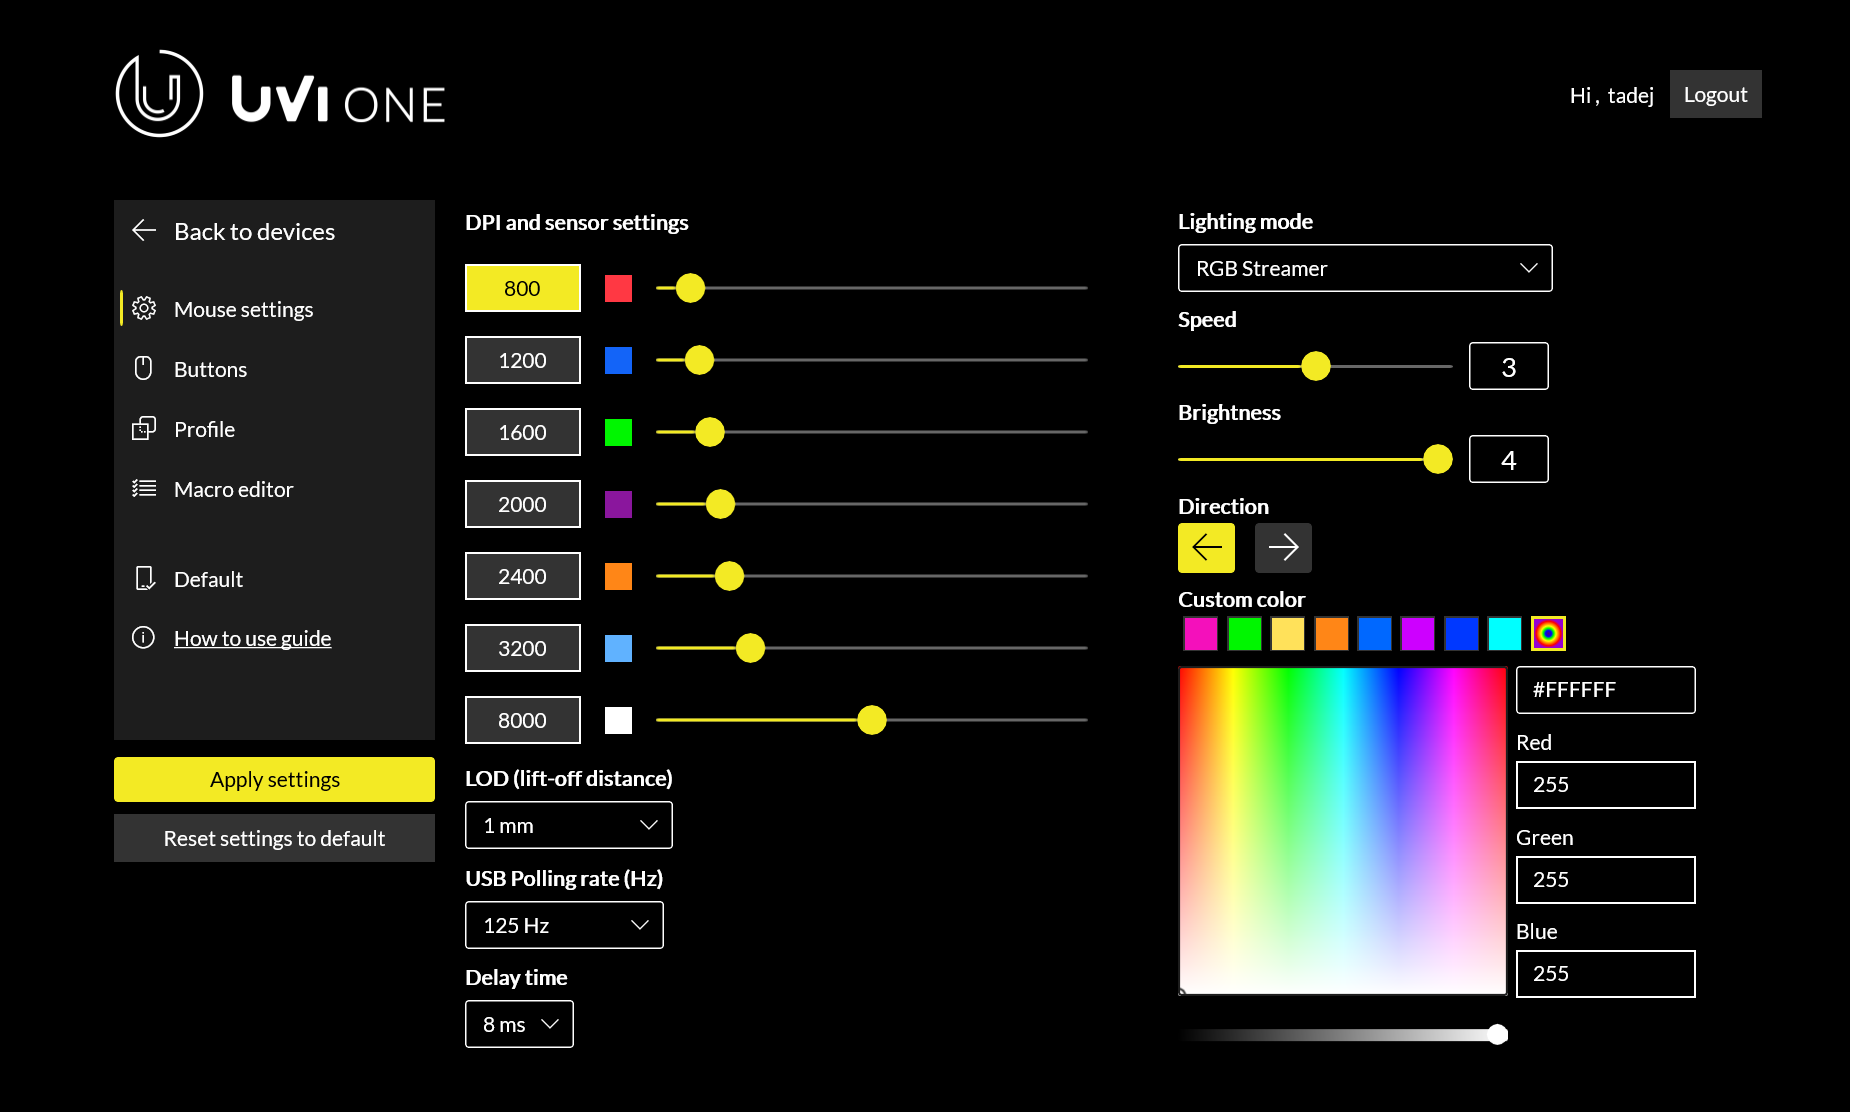
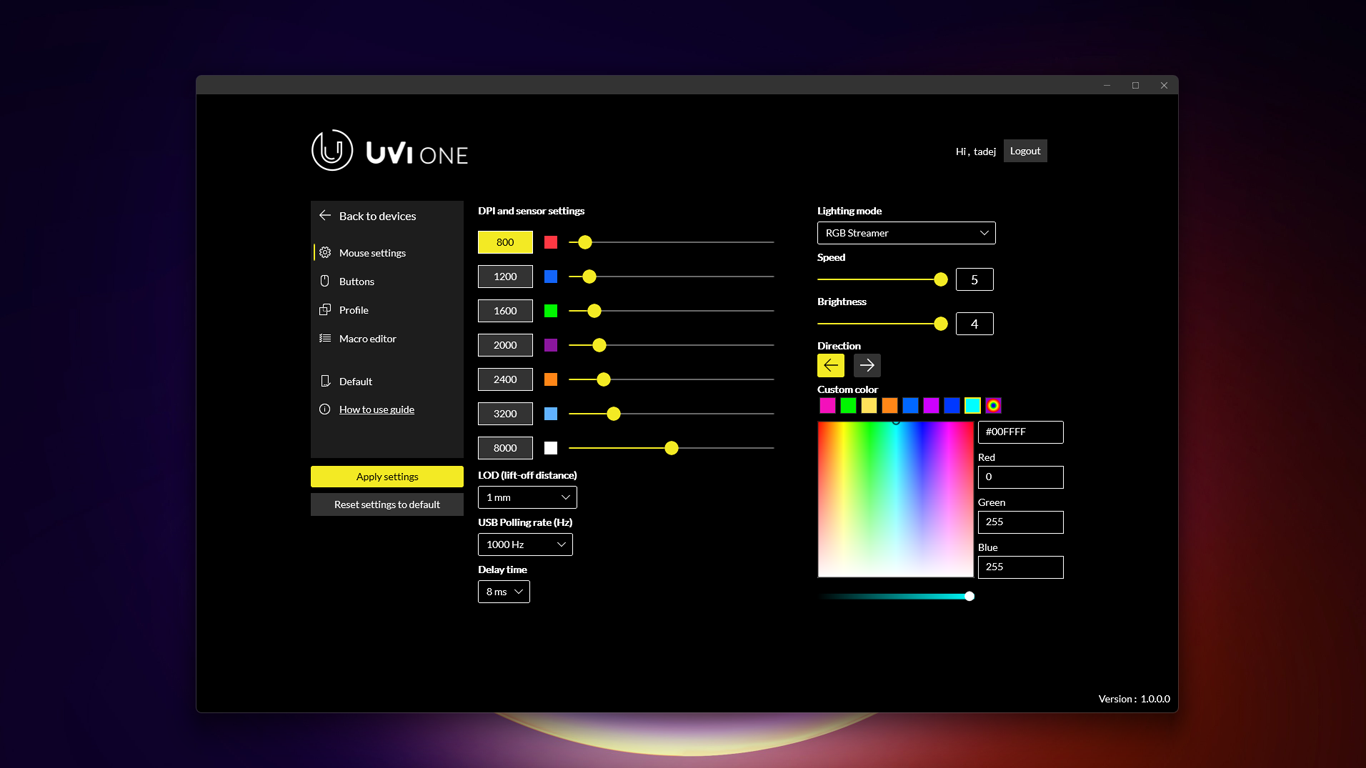
When your UVI Lust mouse is connected it should appear in the UVI One application. The first tab “Mouse settings” is where you can change various mouse settings like DPI, LOD (lift of distance) polling rate, lighting effects, and more. When you make changes to the settings of the mouse don’t forget to confirm those changes by clicking the button “Apply settings”.
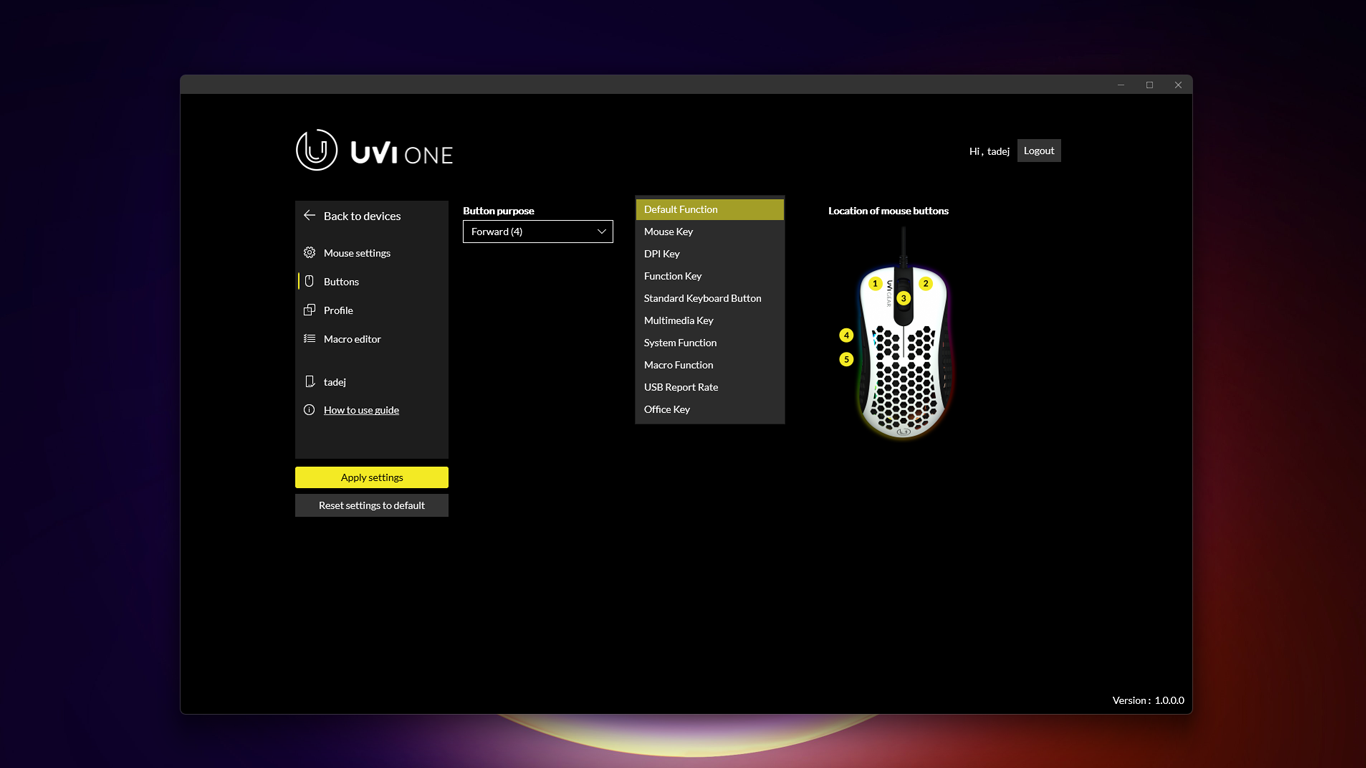
Navigation to the tab “Buttons” will open options to change the mouse button purpose. First, select the button you would like to edit and then select the new purpose for the selected button. Keep in mind that selecting a new purpose for the button could lead to disabling the confirmation button on the mouse and you will have to plug in the second mouse to repurpose or reset settings to default.
To enable the creation of profiles for your mouse settings, you must create a UVI account. We strongly advise that you create a UVI account so all mouse settings are saved to the cloud and can be accessed from other computers.
To load your profile under the tab “Profile” select profile and hit the button “Apply settings”. Your currently selected profile is displayed on the navigation menu above “How to use guide”.
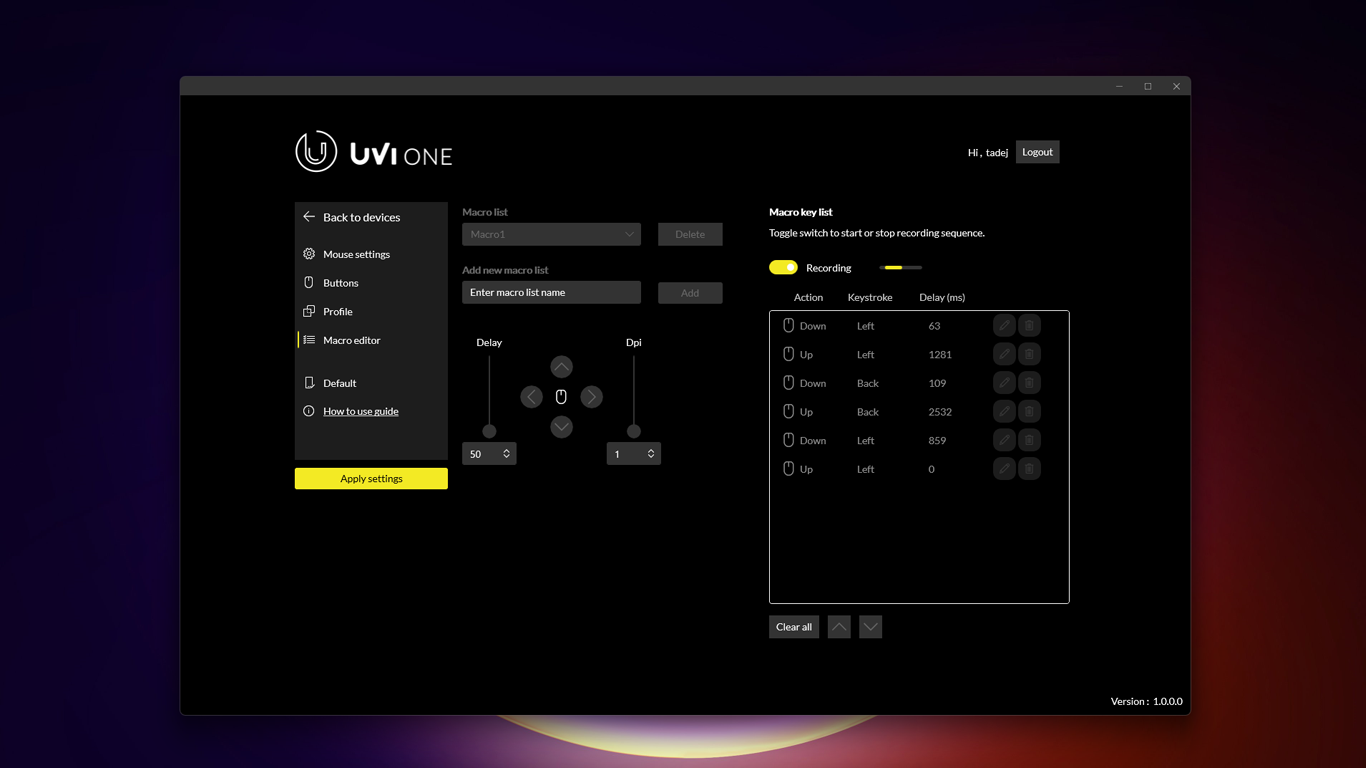
The Macro editor is for advanced users or users that would like to make some special sequences for desired buttons.
To create your first macro please name your macro and add it to the macro list. The newly added macro will be automatically selected. With the press on the toggle switch recording of the macro sequence will begin.
Start pressing the buttons or keys you would like to record and after you are happy press the toggle switch again to stop recording. Now you can modify each recorded keystroke. When you finish editing the macro you can assign it under the tab “Modify keys”.
When assigning macros, be careful, as the assigned button/key will have macro functions and this action can disable for example mouse button. If you disable the crucial mouse button by mistake you can always plug in the second mouse and “Reset settings to default” or reassign the button.
UVI Wrath 7.1
When your UVI Wrath 7.1 headphones are connected they should appear in the UVI One application. The first tab “Headphones Settings” is where you can change how you hear sound from your headphones. When you make changes to the settings don’t forget to confirm those changes by clicking the button “Apply settings”.
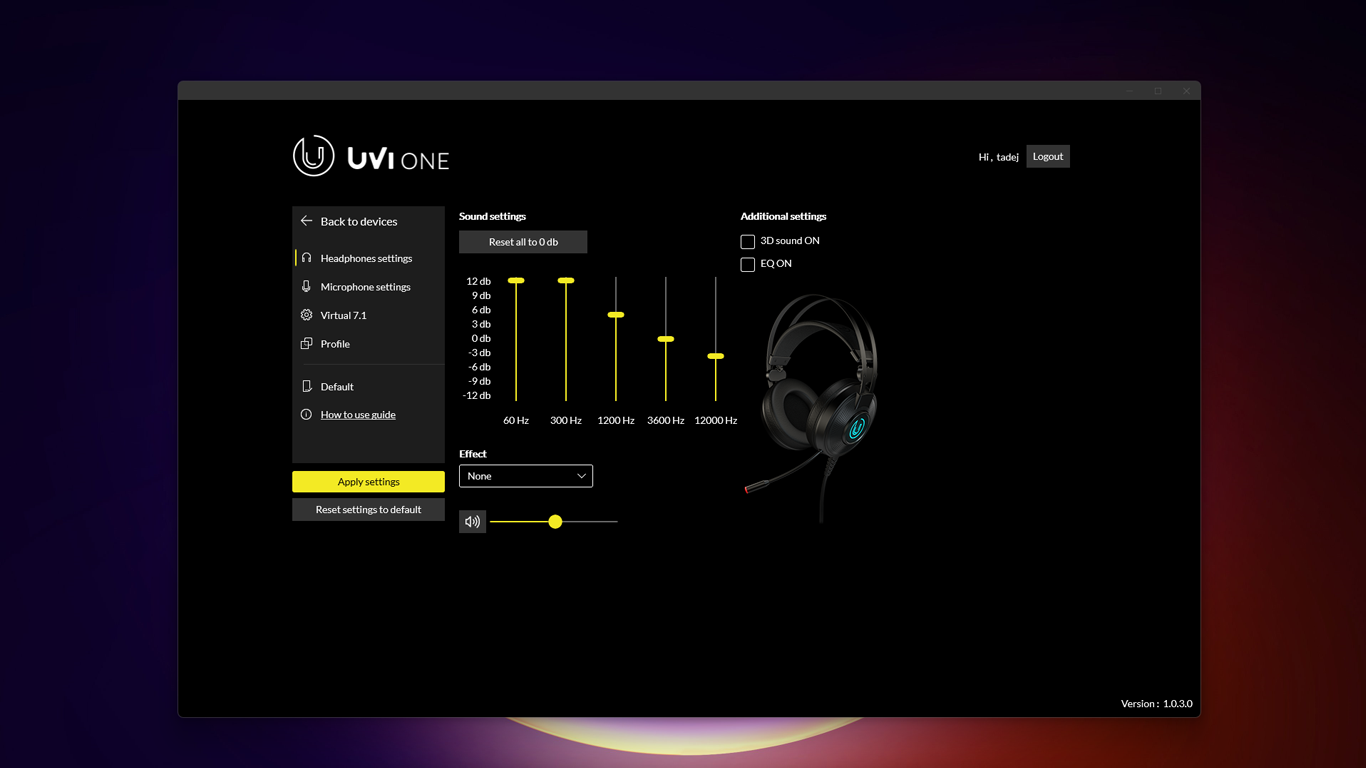
Under the tab “Microphone settings” you can test adjust power and mute your microphone.
Tab “Virtual 7.1” brings additional settings to the virtual surround sound in your headphones. This is for advanced users that understand how surround sound is working.
To enable the creation of profiles for your headphones settings, you must create a UVI account. We strongly advise that you create a UVI account so all mouse settings are saved to the cloud and can be accessed from other computers.
To load your profile under the tab “Profile” select profile and hit the button “Apply settings”. Your currently selected profile is displayed on the navigation menu above “How to use guide”.
Some users may have problems with some features of headphones. Please visit this guide (click me) to overcome those problems.
UVI Pride V2 and Pride Mini
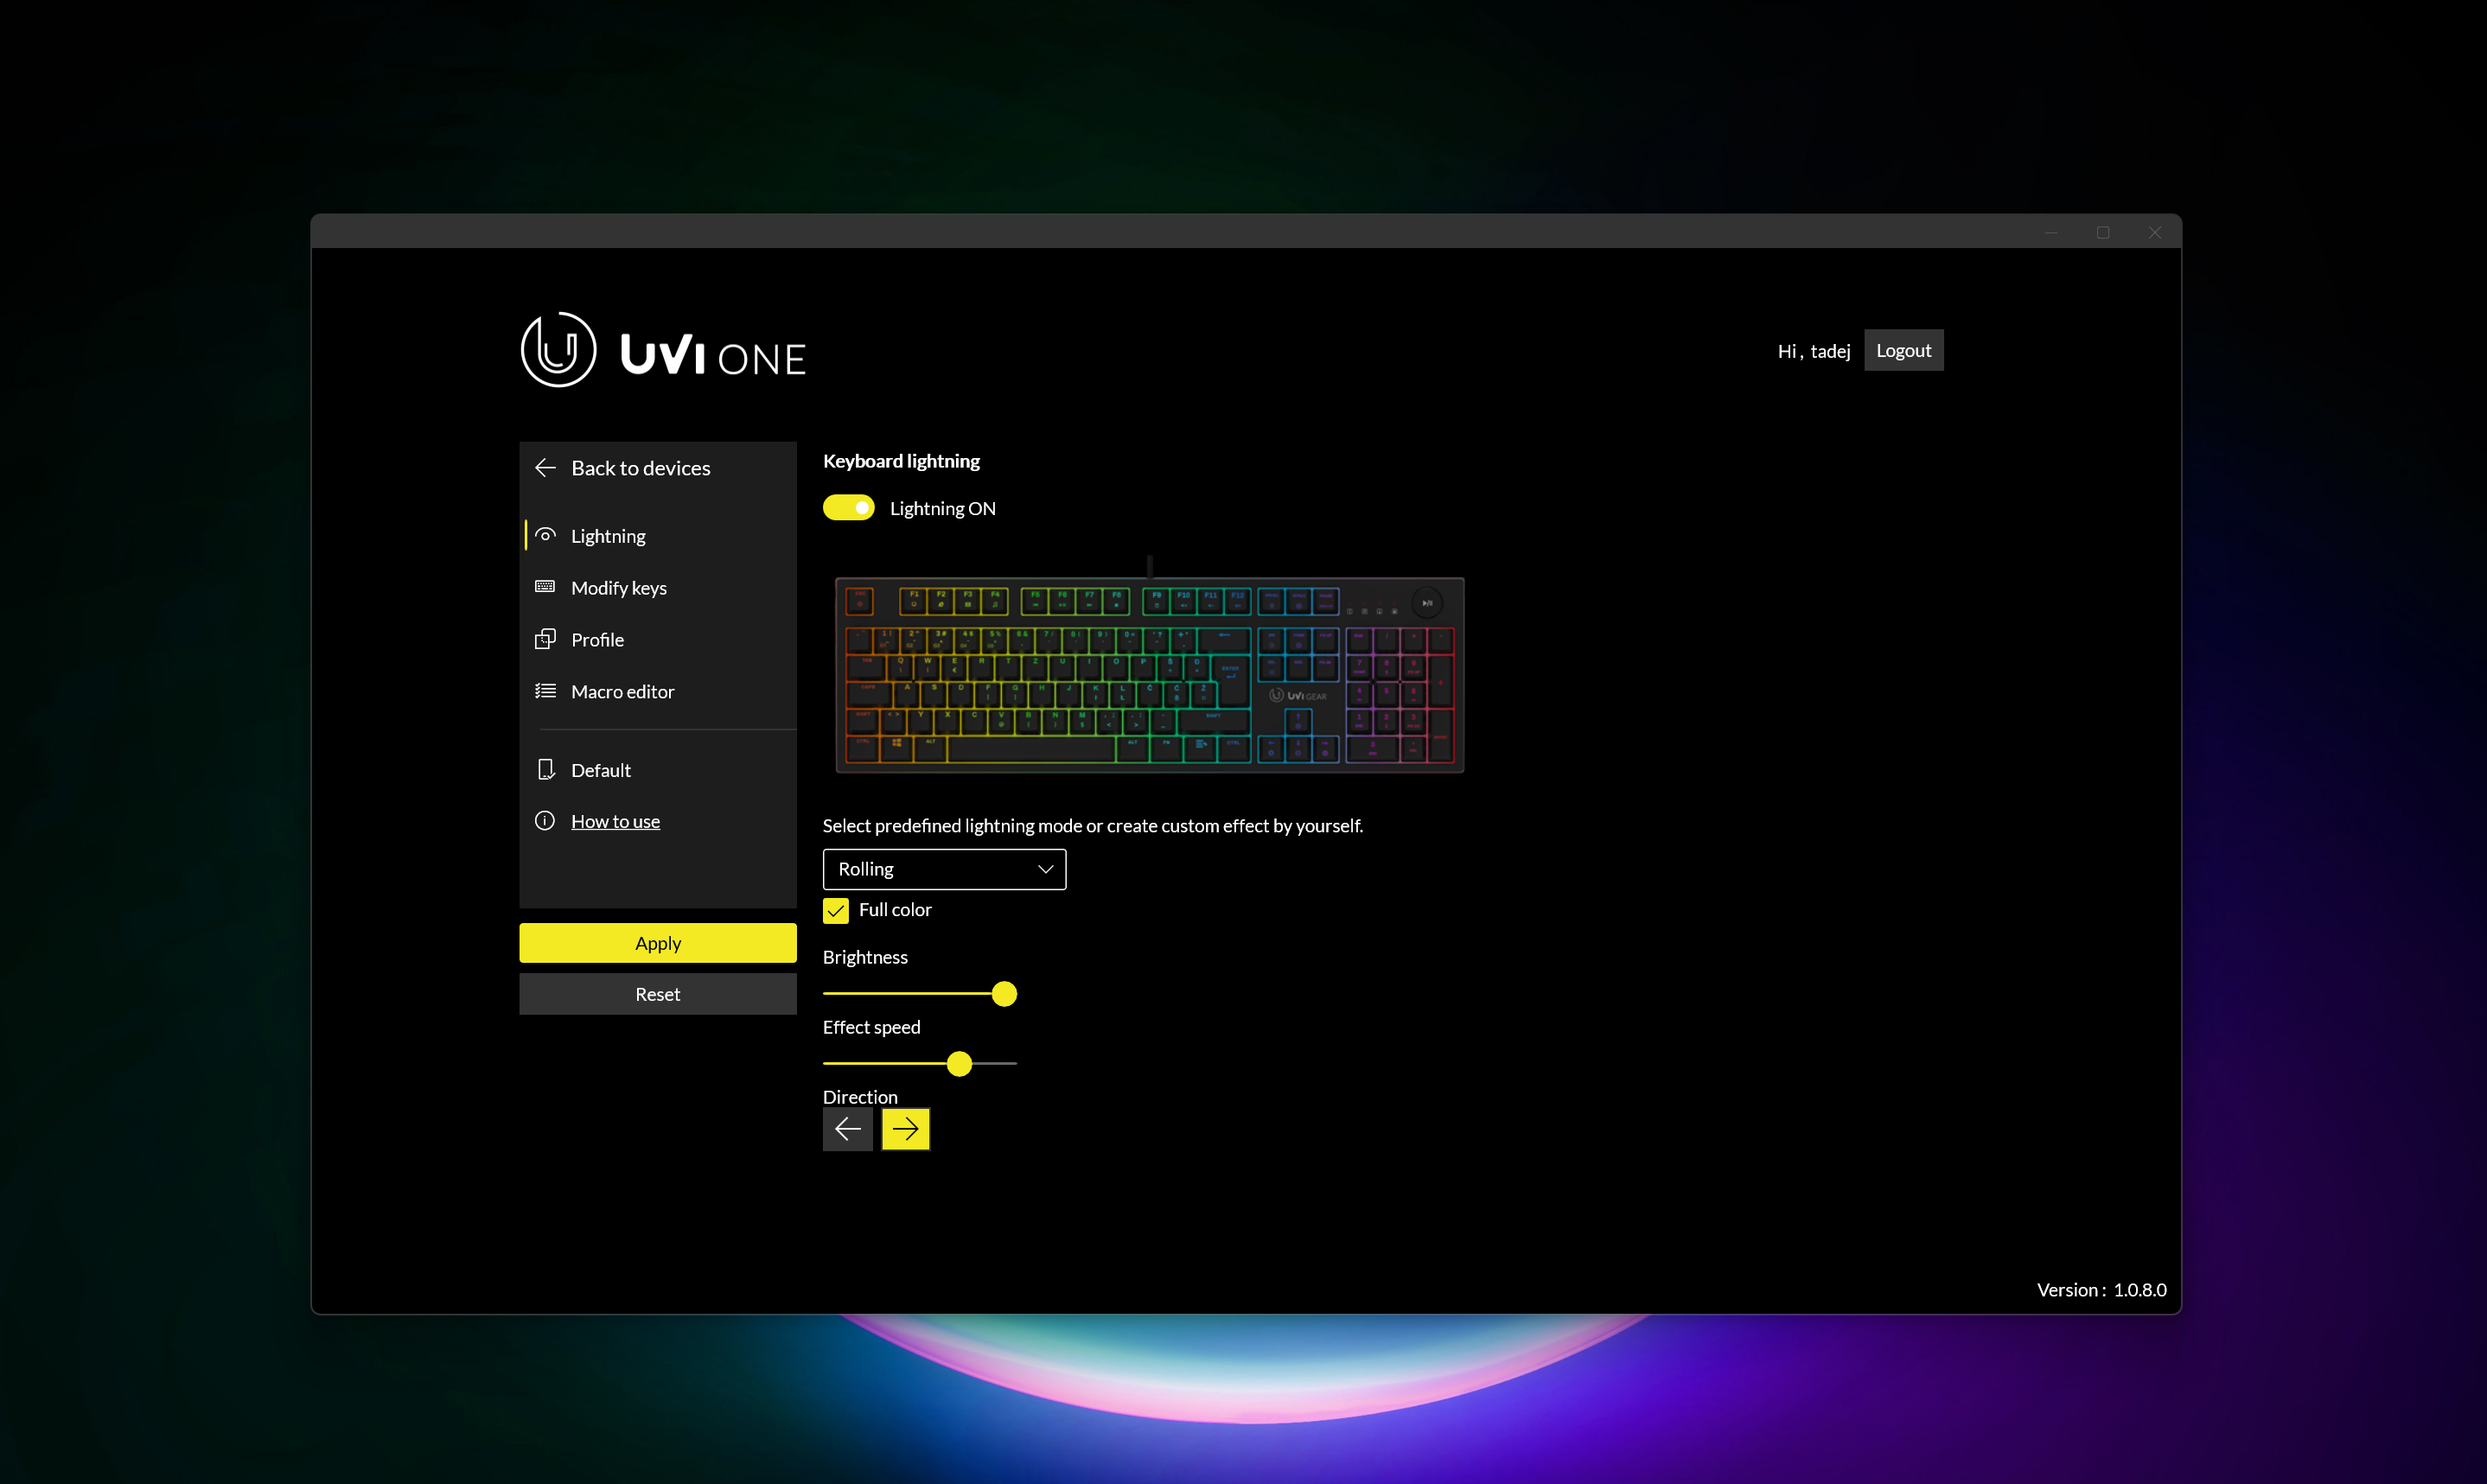
When your UVI PRIDE or PRIDE MINI keyboard is connected it should appear in the UVI One application. The first tab “Lightning” is where you can change keyboard lightning. We offer various modes that can be chosen from. Some modes have additional settings like; direction, speed, color… When you make changes to the settings don’t forget to confirm those changes by clicking the button “Apply settings”.
Under the tab “Modify keys” you can change each key function, and assign a combo or macro. There are also some other functions (Disable key, Multimedia….) that can come in handy and are up to you to explore.
To enable the creation of profiles for your keyboard settings, you must create a UVI account. We strongly advise that you create a UVI account so all settings of your keyboard are saved to the cloud and can be accessed from other computers.
To load your profile under the tab “Profile” select profile and hit the button “Apply settings”. Your currently selected profile is displayed on the navigation menu above “How to use guide”.
The Macro editor is for advanced users or users that would like to make some special sequences for desired buttons.
To create your first macro please name your macro and add it to the macro list. The newly added macro will be automatically selected. With the press on the toggle switch recording of the macro sequence will begin.
Now start pressing the buttons or keys you would like to record and after you are happy press the toggle switch again to stop recording. Now you can modify each recorded keystroke. When you finish editing the macro you can assign it under the tab “Modify keys”.